Making the Solid Squares Quilt: A Step-by-Step Guide
Hey there, crafty friends! I’ve always had a bit of an obsession with quilts. There’s something magical about stitching together different pieces of fabric, each with its own story. But let me tell you, my adventure with quilting truly took off when I discovered the Solid Squares Quilt pattern. I remember the first time I decided to tackle this quilt; I was a bit nervous, but once I got going, I realized how easy and satisfying it really is! The blend of colors and textures came alive under my hands, and that feeling of creating something from scratch is unbeatable.
The Solid Squares Quilt is perfect for anyone who’s just starting out in the quilting world or for seasoned pros looking for a quick and enjoyable project. I can’t wait to share the ins and outs of this exciting pattern with you so you can make your very own masterpiece. Alright, grab your fabric, and let’s dive into this fun journey of creating the Solid Squares Quilt together!
Simple Yet Stunning: The Magic of Color Combinations
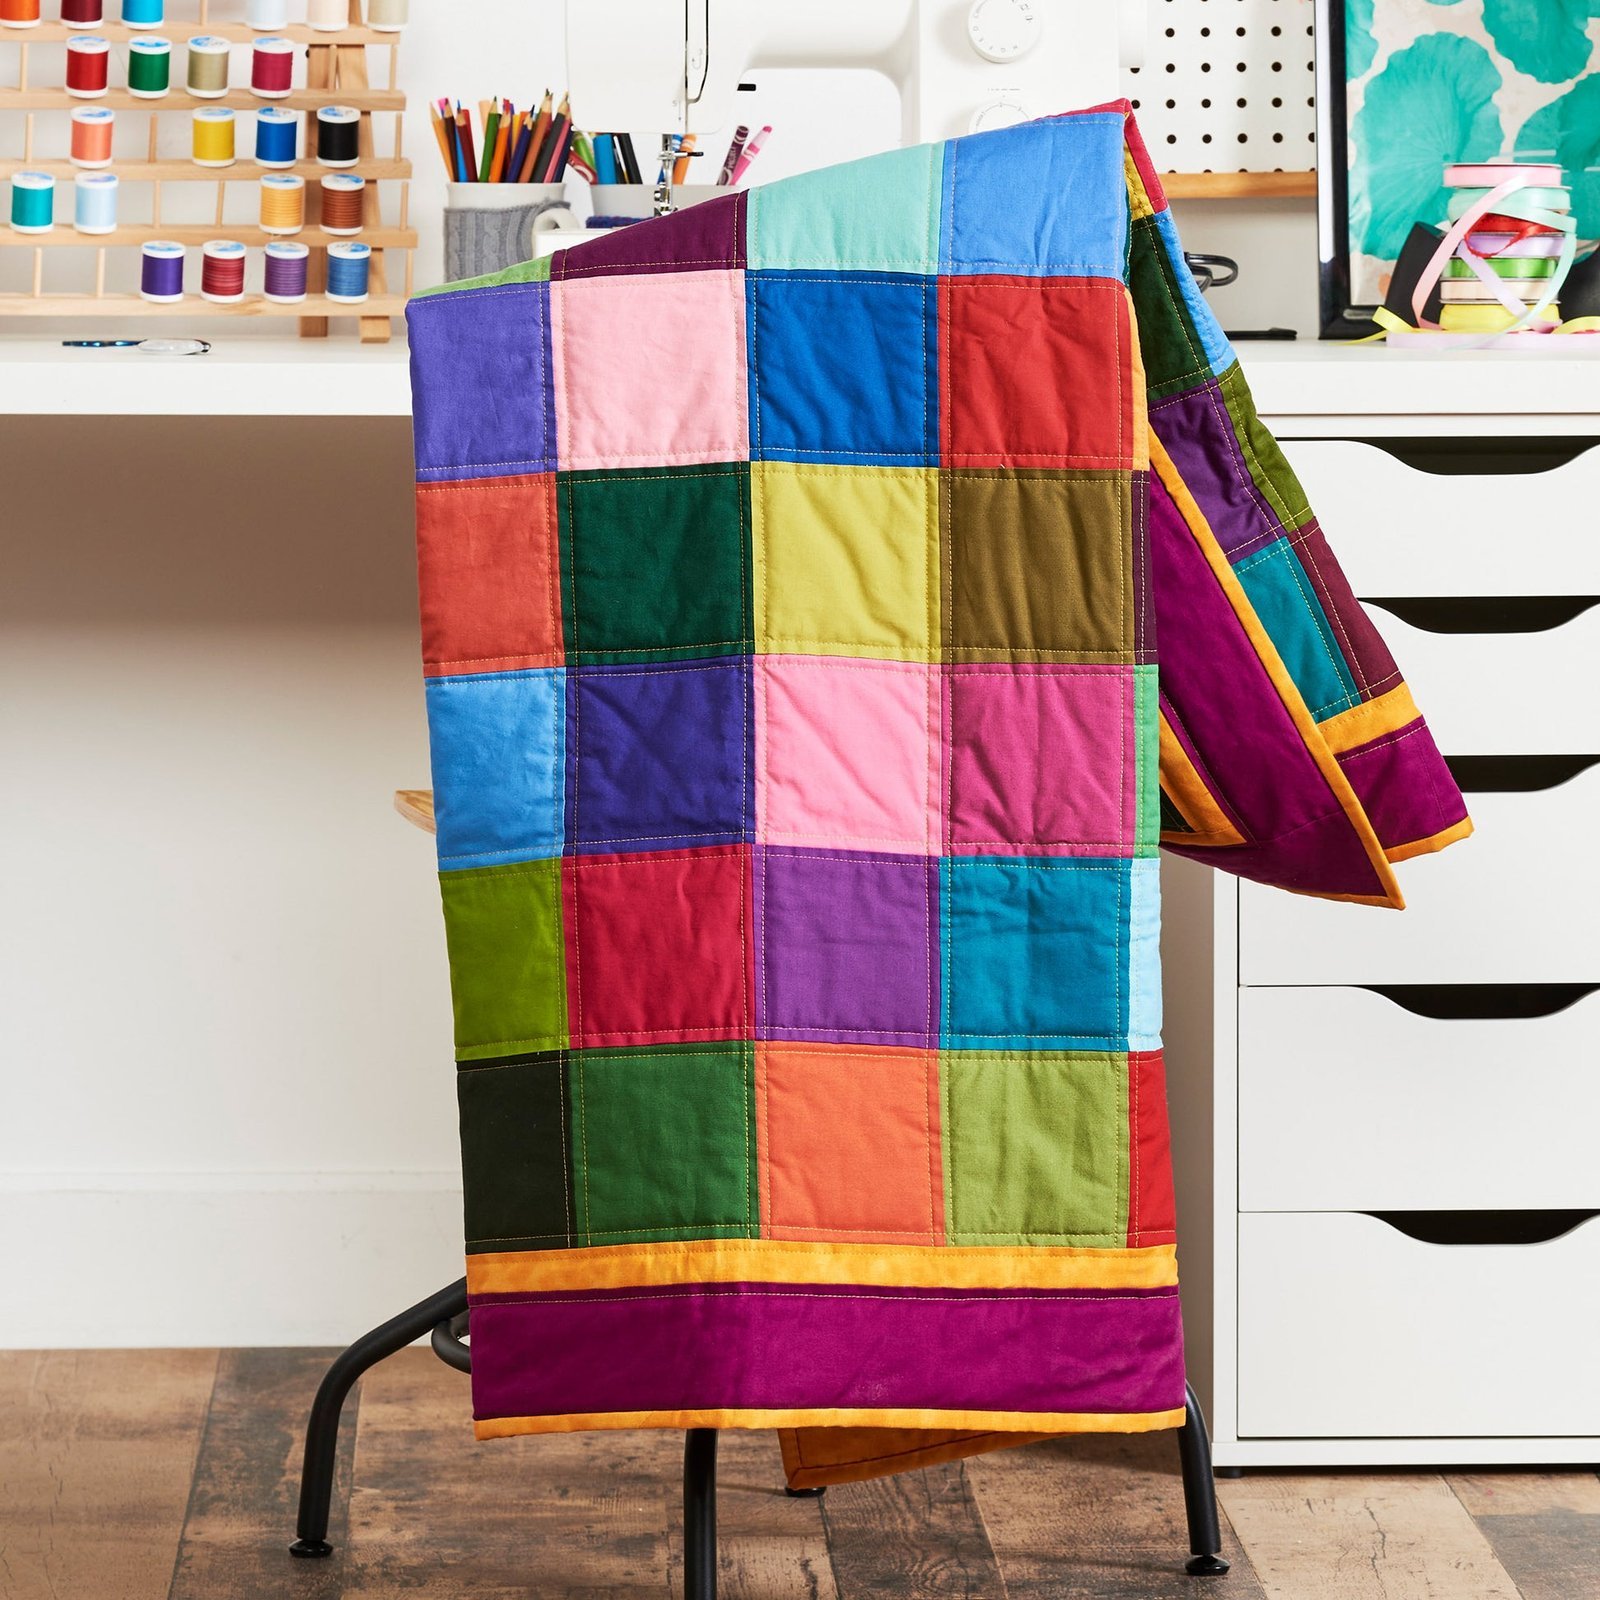
One of the most delightful aspects of the Solid Squares Quilt is the sheer versatility in color combinations. When I first laid out my squares, I spent hours arranging and rearranging them until I found just the right balance! Choosing these 5″ (12.5 cm) fabric squares from your favorite color palette allows your creativity to shine. It’s amazing how such simple squares can come together to create a mesmerizing visual feast.
As you explore this pattern, consider mixing different fabric textures and shades. Think about how different colors can stir emotions; for example, a palette of bright, cheerful colors can bring joy, while warm earth tones can evoke a sense of calm. Don’t be afraid to experiment until you find that perfect combination that speaks to you. Remember, quilting is as much about the process as it is about the final product!
Techniques to Elevate Your Quilting Game
When I first started with the Solid Squares Quilt, I underestimated how much little techniques could influence the final product. One of my favorite tricks is to press the seams in opposite directions for each row. It not only helps with alignment but also gives your quilt a finished look. This technique will ensure that your squares come together seamlessly. Plus, it’s so satisfying to nest those seams together as you sew the rows!
Along with proper seam allowances, another essential technique is managing your thread tension. I love using Coats & Clark™ Quilting and Piecing thread as it blends beautifully with a variety of fabrics. Take the time to adjust your thread tension before you begin sewing. It’s the little details like these that make your quilting journey smoother and more enjoyable, and they will certainly make your finished Solid Squares Quilt shine!
Materials You’ll Need
- Coats & Clark™ Cotton Machine Quilting Thread, 7450 Temple Gold
- Coats & Clark™ Quilting and Piecing Thread, 450 Nugrey
- 1 pre-cut fabric pack containing 85 5″ (13cm) squares
- ¼ yd (.25m) Inner border fabric
- ½ yd (0.5m) Outer border fabric
- ½ yd (0.5m) Binding fabric
- 3½ yds (2.4m) backing fabric
- 50″ x 60″ (127 x 153 cm) batting
- Optional: cut your own 5″ (12.5 cm) squares from scraps
Preparing for Success: Tips Before You Start
Before diving into the Solid Squares Quilt, I highly recommend clearing out a dedicated workspace. Being organized can help you focus better and enjoy the creative process without distraction. Set your sewing area with all your materials ready to go, like scissors, rulers, and pins, so you won’t have to waste time hunting for them later!
Also, take a moment to read through the entire quilt pattern before you begin. Understanding each step beforehand will help you feel more confident as you create. I’ve noticed that when I’m well-prepared, my quilting experience is so much more enjoyable, and the final outcome is always a lovely surprise!
Step-by-Step Instructions:
Below, I’ll guide you through the step-by-step instructions for completing the Solid Squares Quilt. You’ll feel proud to see each piece come together as you follow along! Don’t forget, you can find the full pattern through the link provided below!

Full Pattern: Click Here
Additional Tips for Success
While you’re creating your Solid Squares Quilt, don’t forget the importance of taking breaks! Quilting can be a labor of love and sometimes feels overwhelming. If you ever hit a snag, step away, and give yourself a breather. I promise, when you return, your fresh eyes will help you see solutions you hadn’t considered.
As you quilt, always pin your pieces together before sewing. It might seem tedious, but it ensures your points match up beautifully. Trust me, a little time spent pinning saves a lot of heartache when it comes to unpicking seams later!
Closing Thoughts: Celebrate Your Craft
Completing the Solid Squares Quilt is no small achievement; it’s a beautiful project that showcases not only your skills but also your unique style! Take a moment to admire your handiwork once you’ve finished. There’s something special about wrapping yourself in something you created with your own hands. So, celebrate that accomplishment!
If you’re looking for more inspiration and exciting projects, I encourage you to check out the other amazing content on the blog. There’s so much to explore, and I’ve prepared an incredible piece for you to dive into by clicking here. You’ll find endless ideas to spark your creativity and help you along your crafting journey!
In wrapping this all up, I hope the Solid Squares Quilt pattern inspires you to get crafty and make something truly heavenly. The joy of quilting is not only in the end product but in the entire process of creating. So grab those squares and start sewing—your masterpiece awaits!